Audio
Microphone Plug & Play Guide
This guide walks support personnel through setting up a plug-and-play microphone with the Syrus Lite device for use in spy/listen-in mode. This version does not require the IP-sealed case to remain closed.
What You Need:
- Syrus Lite device (powered on)
- SIM card with voice calling enabled (must support audio)
- Standard USB microphone
- Apex firmware properly loaded onto the device
- Access to Pegasus Cloud for firmware verification and control
Step-by-Step Instructions
- Insert the SIM
Use a SIM card that supports voice calls.
Optionally, configure it with a known caller number for authorized access.
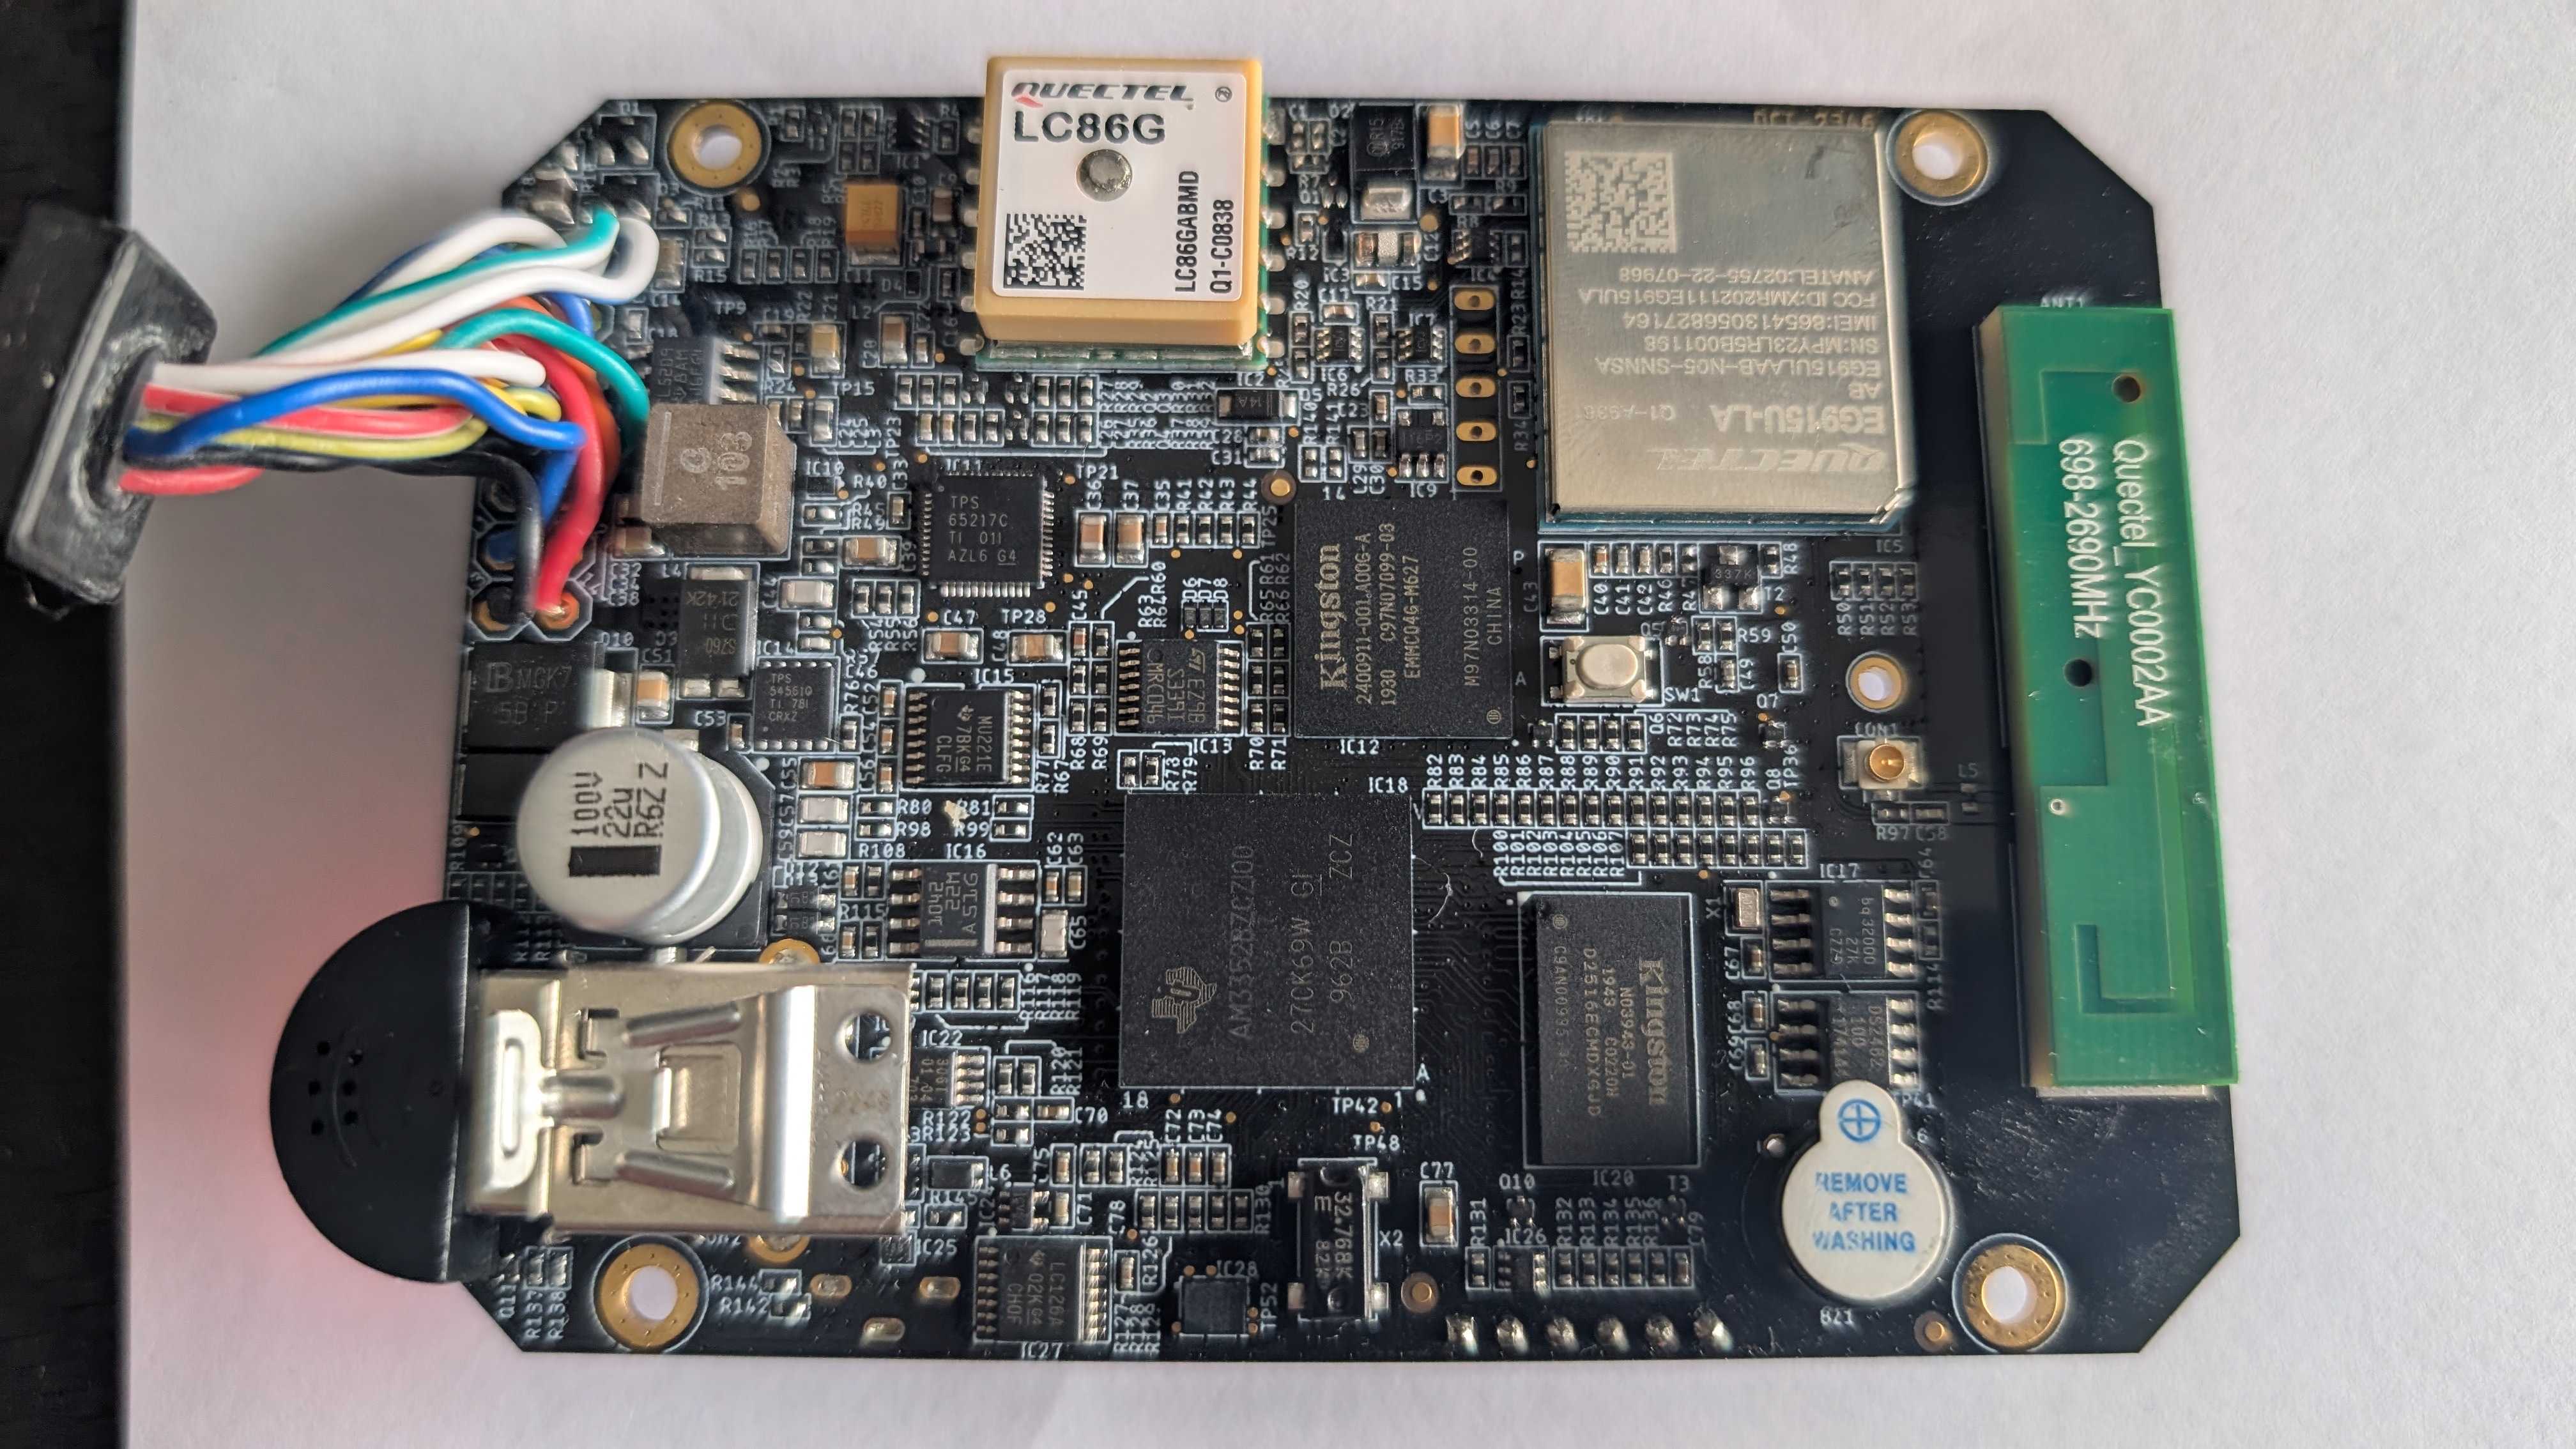
- Connect the Microphone
Plug the USB microphone directly into the USB port of the Syrus Lite board.
Since this is for support and testing, the IP-sealed case can remain open (see image for reference).
- Verify Firmware
Log into Pegasus Cloud
Make sure:
Apex is installed
SyrusJS version is not required for this feature
- Call the Device
There are two calling modes:
Unrestricted: The device accepts calls from any number
Restricted (Recommended): The device only accepts calls from authorized numbers
If restricted mode is preferred, make sure to configure the authorized number(s) in Pegasus Cloud or via a command file.
How to Trigger Spy Mode:
Simply call the number associated with the SIM inserted in the Syrus Lite.
If the setup is correct, the microphone will begin transmitting audio from the environment.
Notes for Support:
Ensure signal strength and SIM credit are sufficient for voice calls.
If audio does not transmit, verify:
That the SIM is active and call-enabled
The microphone is functional and securely plugged in
Apex firmware is correctly loaded
For long-term deployments, use the IP-sealed internal wiring method (see engineer version of the guide).
Updated about 20 hours ago