Fuel Level Sensor
Fuel level sensor Technoton connection information
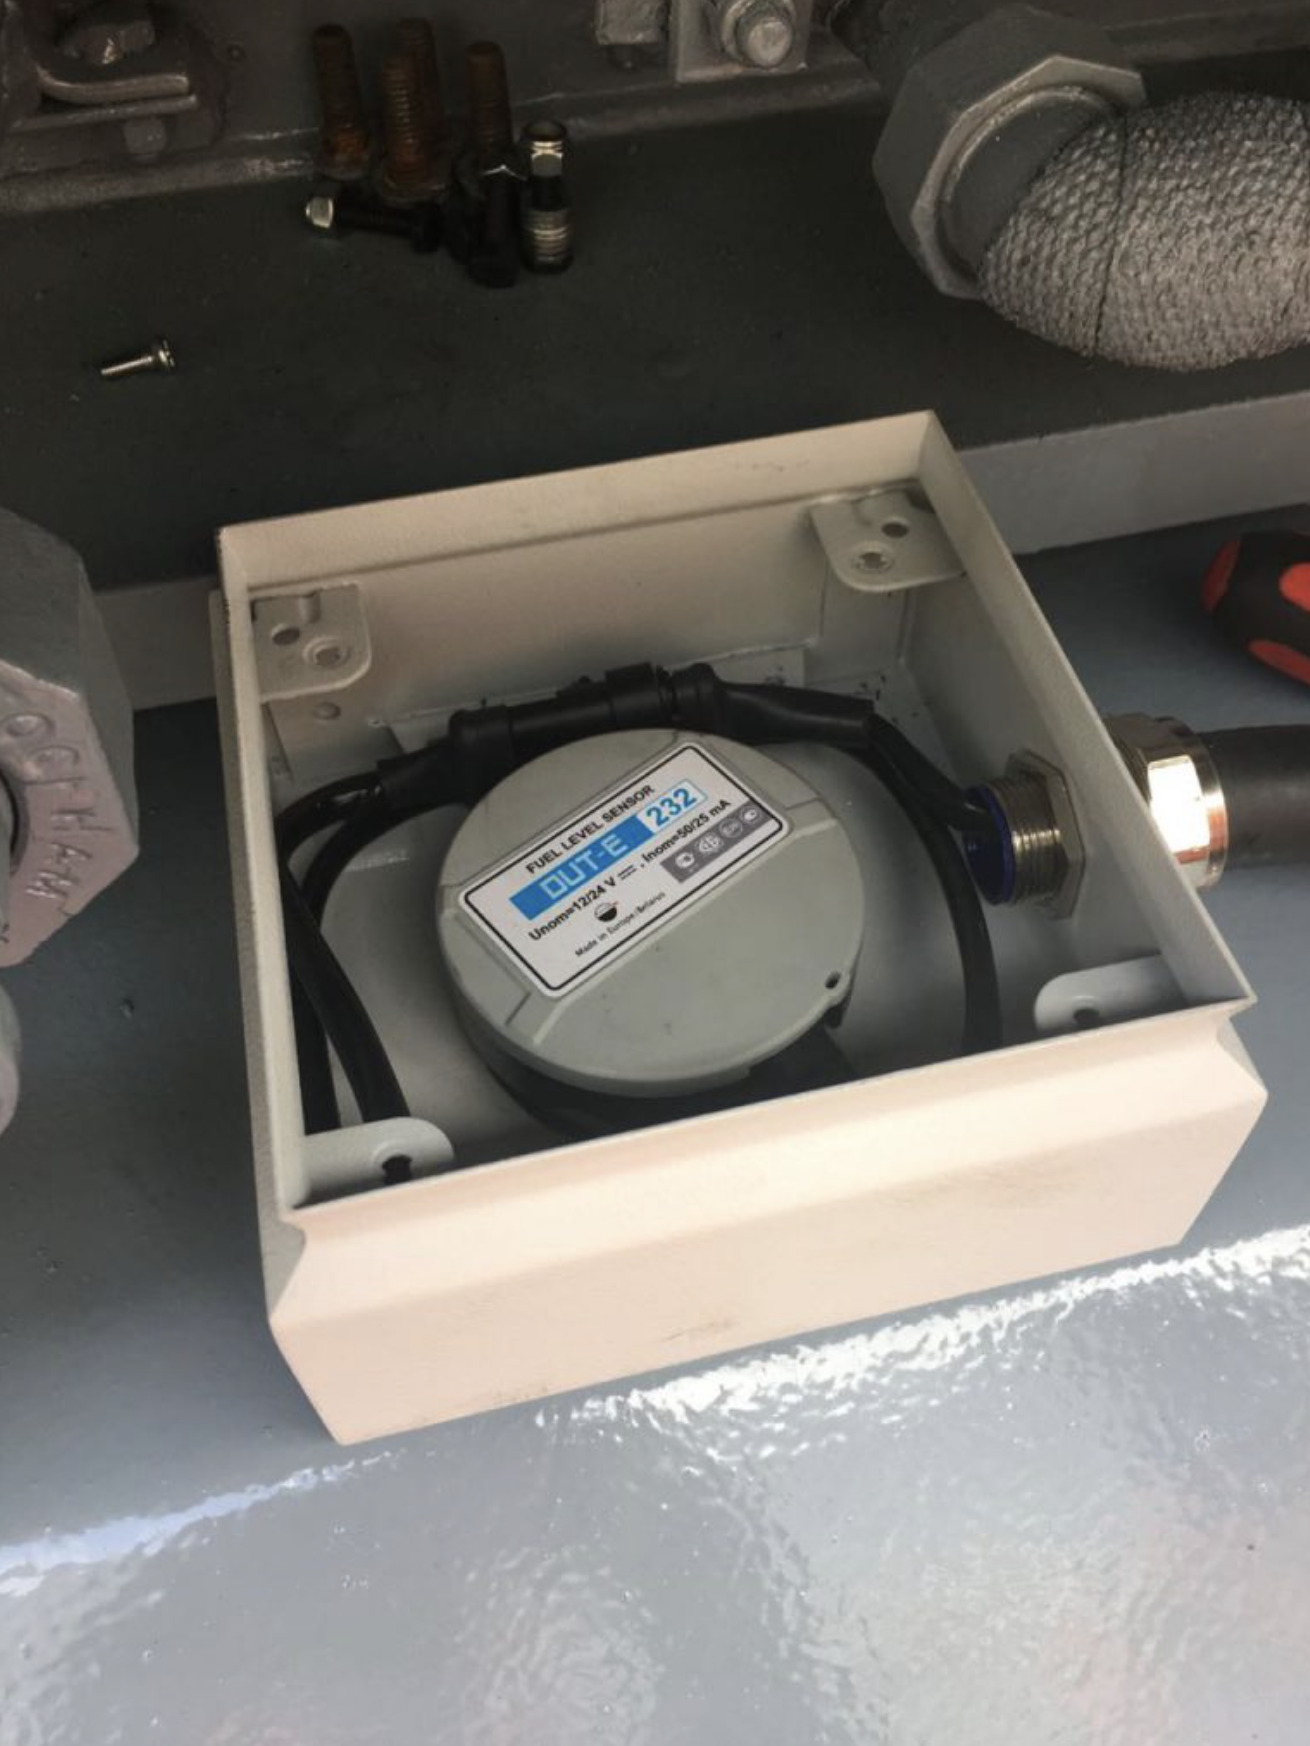
Syrus 4 is capable of connecting to Technoton's DUT-E fuel level sensor (Model RS 232) which is capable of reading fuel level and detecting fuel theft.
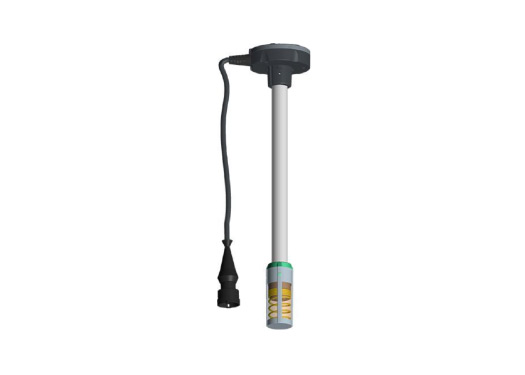
These sensors are designed for precision fuel level measurement in all kinds of vehicle tanks, also in tanks of fixed installations, which can be used as a part of a fuel monitoring system or to substitute the standard fuel meter of a vehicle.
Installation / Wiring Diagram
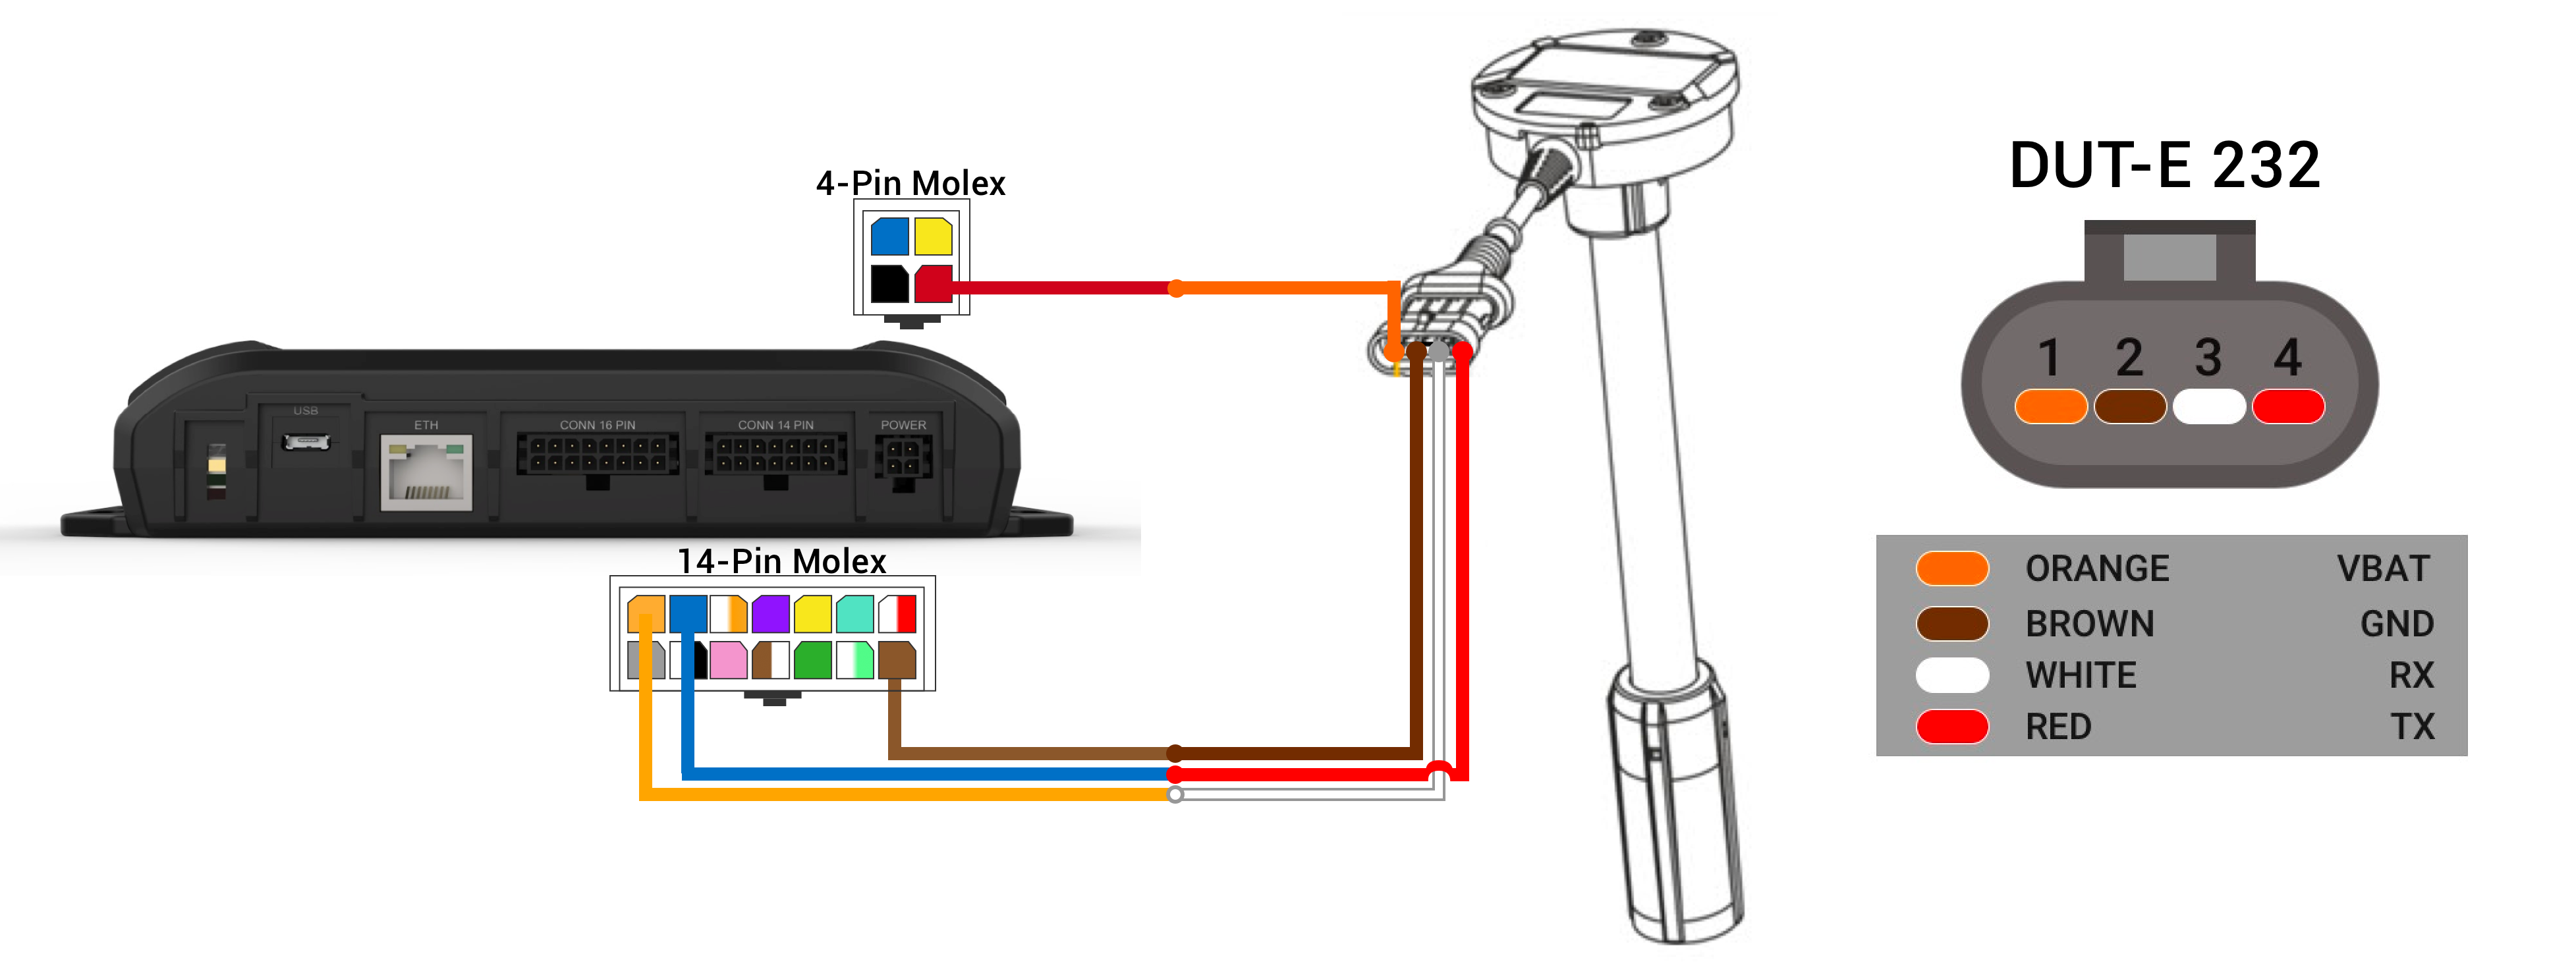
| Syrus Wire | Syrus Signal | Description | Signal | Technoton DUT-E 232 |
|---|---|---|---|---|
| Red | PWR | Voltage for DUT-E 232, connect to the Syrus main power Red cable. | VBAT | Orange | Brown | GND | Ground for DUT-E 232, connect to the Syrus Brown GND cable. | GND | Brown |
| Orange | RS232_TX | DUT-E 232 data receiver, connect to the Syrus Orange TX cable. | RX | White |
| Blue | RS232_RX | DUT-E 232 data transmitter, connect to the Syrus Blue RX cable. | TX | Red |
Guide Technoton DUT-E 232
It's recommended to follow the manufacturer's suggested installation guide (contact), this guide is a brief walkthrough of what to expect.
What you'll need
- DUT E Service Kit (hardware and software)
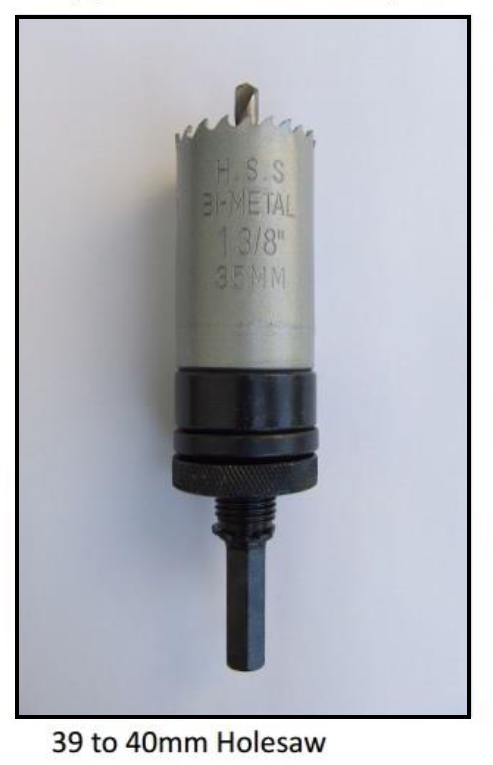
- Holesaw 39 to 40mm
- Tube Cutter
- Hacksaw
- 80cm 2’ diameter pipe, sealed at bottom
- Netbook/Laptop with available USB port
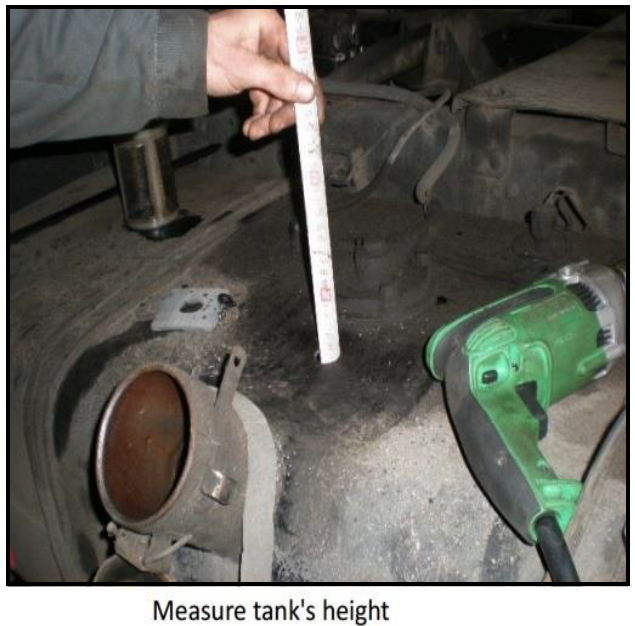
Try to see if the sensor can be installed in the middle of the tank, if not any location is OK. Every tank will have a wave breaker, please take note of this, make sure the hole doesn't hit the wave breaker plate.
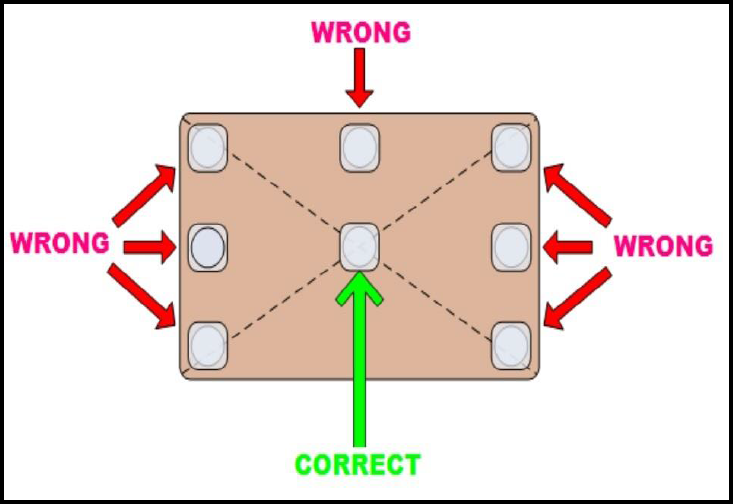
Correct location for installation

Technoton Configuration
You have to get DUT-E Service Kit in order to configure the sensor, the Service Kit comes with all necessary hardware, cables, DUT-E software and USB driver. Please make sure you are using DUT-E software V3.6 and above.
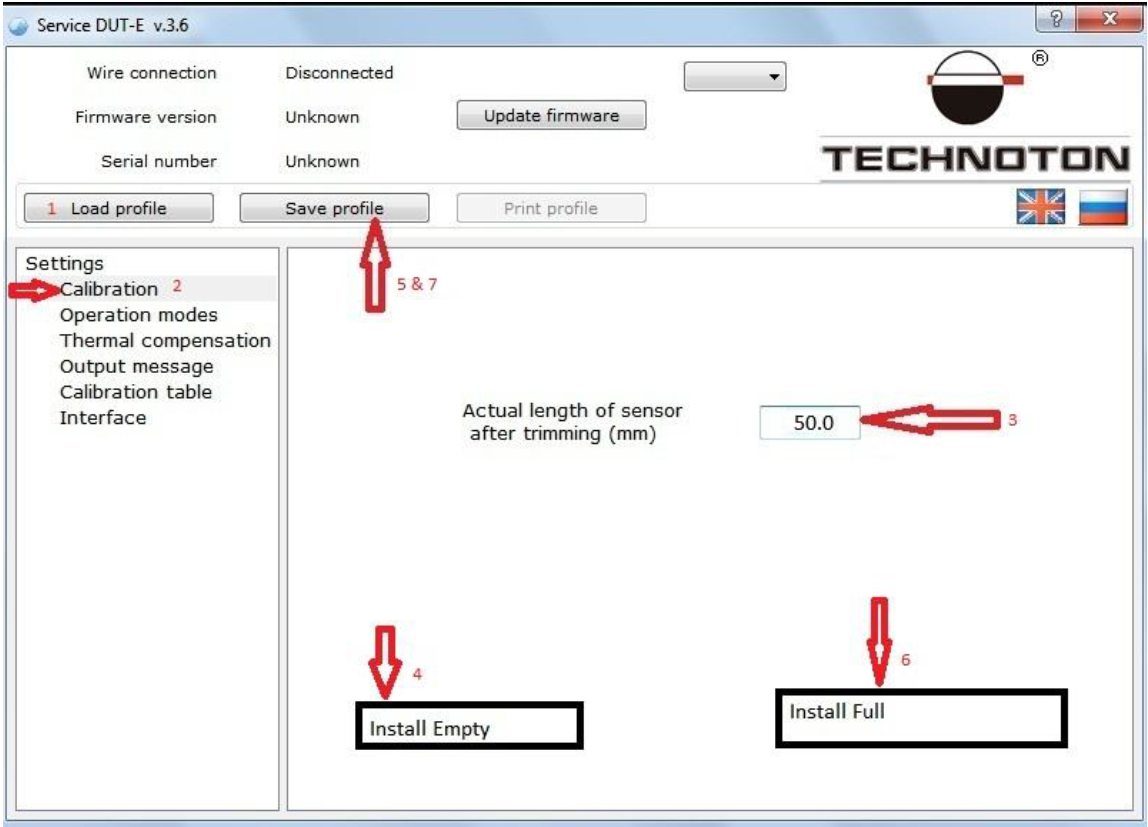
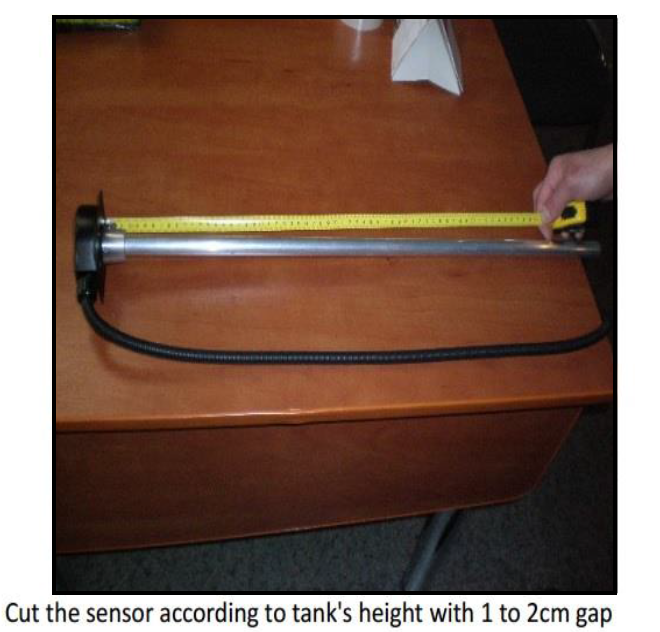
Once sensor is cut connect it to Service Kit, open DUT-E Service Kit software, it will auto connect with correct COM port.Please make sure sensor Firmware is version 2.1 and above. 1. Click Load profile from sensor. 2. Enter actual height of the sensor in mm (assuming sensorheight is 500mm after cut). 3. Click Install Empty 4. Click Save profile > to sensor, enter the password (can be found on the warranty paper). Please do not disconnect the sensor from PC.
You have to prepare 2' diameter round pipe with 80cm height, it should be sealed at the bottom, picture below.
Pump out diesel from the tank and pour it into the pipe until full (all the way to top) and insert the sensor in to the pipe, wait for 2 minutes:
- Click Install Full
- Click Save Profile > to sensor
Once the above is done pullout sensor from the pipe but do not disconnect it from PC.
Operation modes
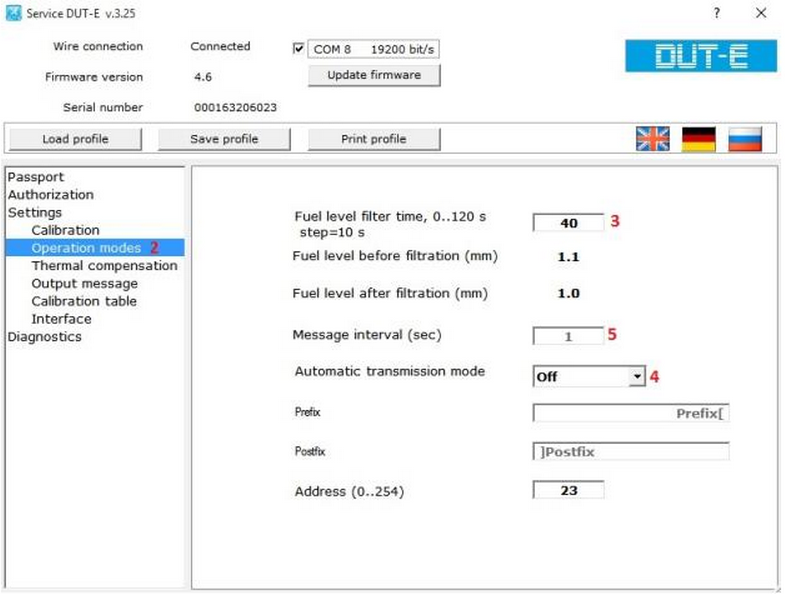
- Click Operation modes
- Filter timer – prevents sudden spike during on the move = 20 to 40 seconds recommended 10. Automatic Transmission mode = Off
- Message interval – set to Zero
- Leave the rest of the values as the default
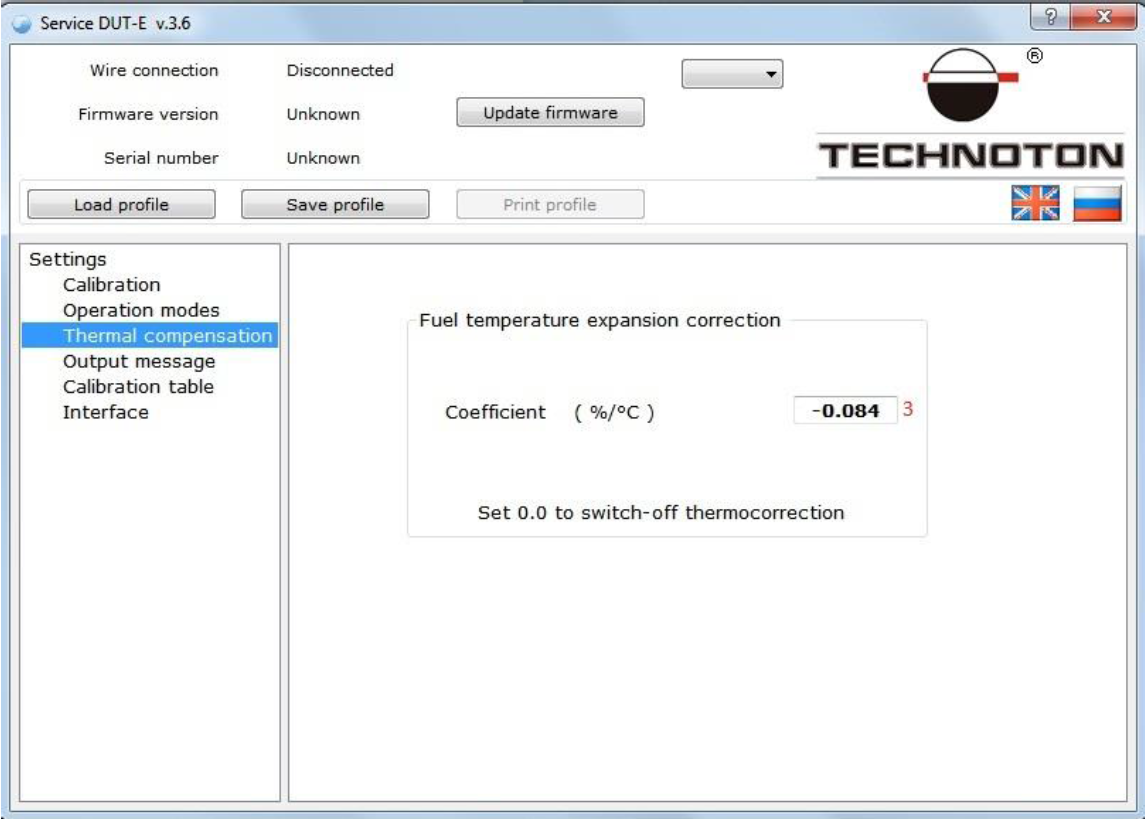
Thermal compensation, no changes, leave it as it is
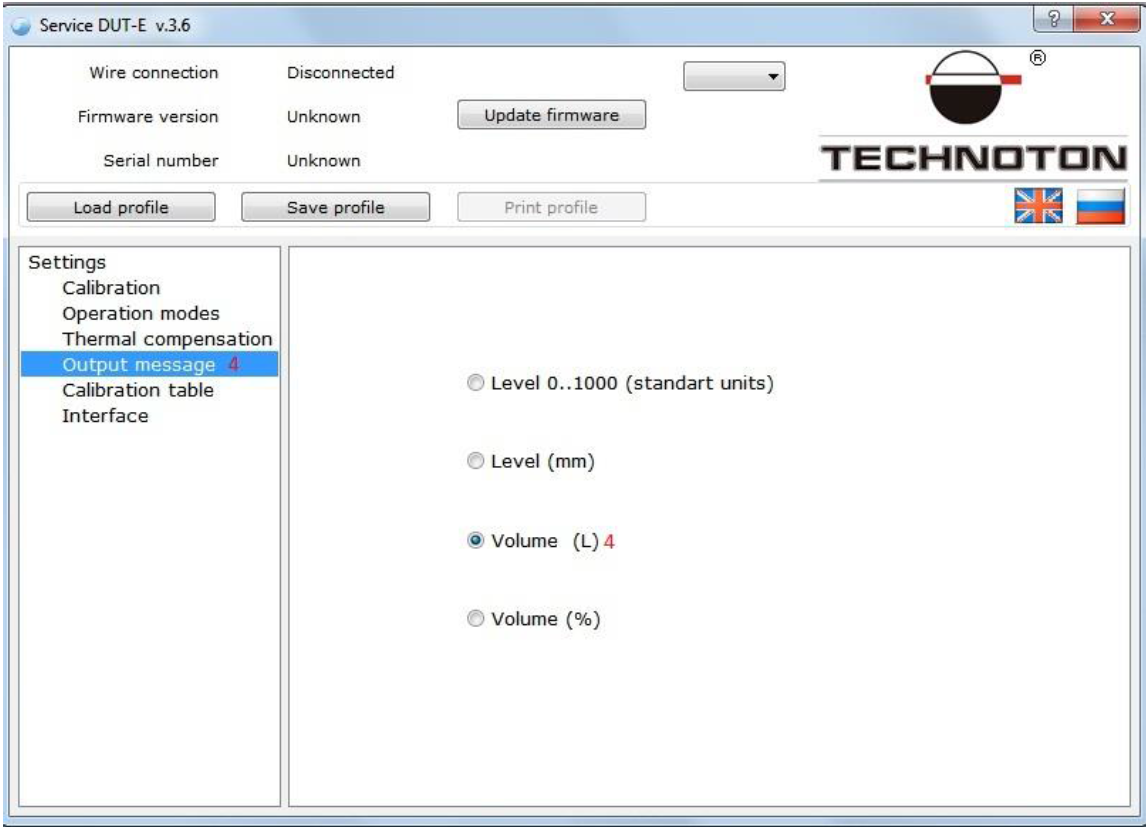
Output message, set Volume (L) IMPORTANT
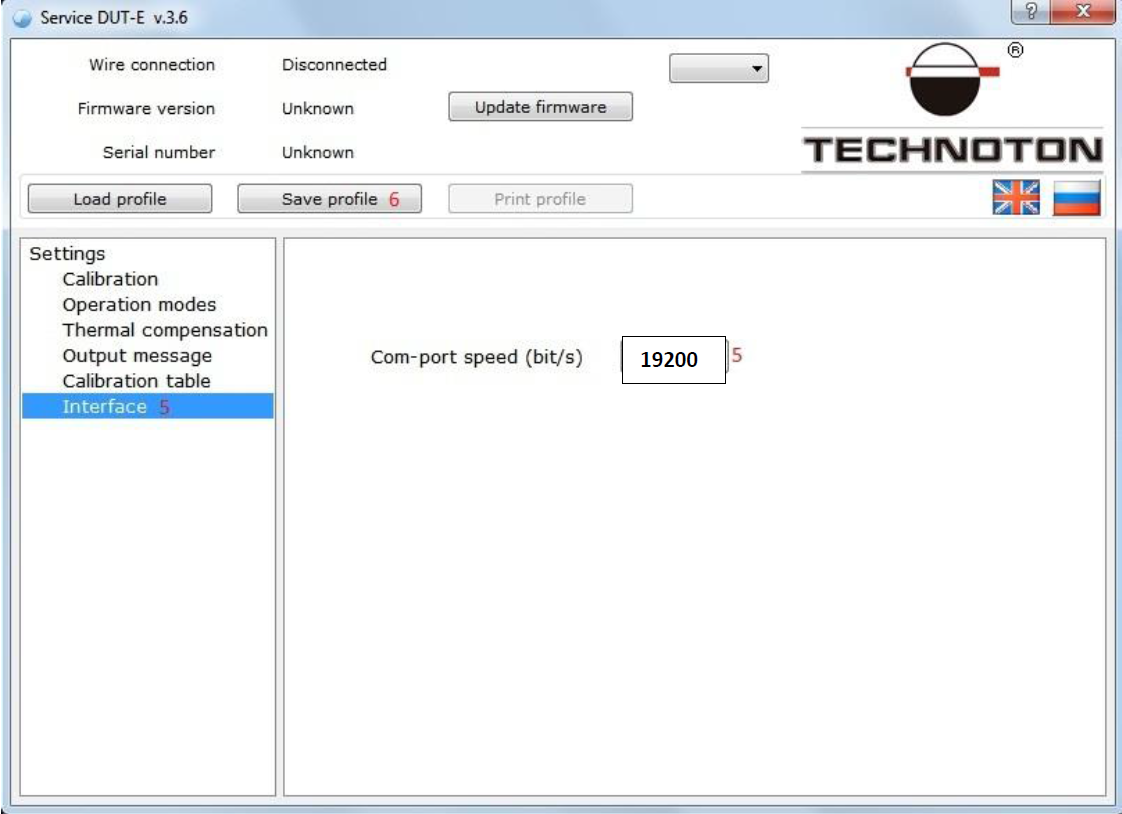
Interface, set to 19200 IMPORTANT
Click Save profile > to sensor

Diagnostics
- Look at “Initial fuel level (mm)” -it should show 2.0 or lower, now insert the sensor into the pipe again very slowly till full and look at the reading, it should increase gradually. It will show 489 to 500 once fully inserted. Now withdraw the sensor slowly and look at the reading, it should gradually drop to 0 to 2. Place the sensor in the middle and various positions, the Initial Fuel level (mm) reading should change according to it's height.
- The sensor can be disconnected from the PC and install to tank.
- Once fully installed bring the truck to the nearest gas station and drain out all the available fuel, make sure it is really empty.
- Reconnect the sensor to PC and go to “Diagnostic” screen again.
- Assume it is a 400L tank, the fill up should be done 40L p/fill up 10 times (40L x 10 fill up = 400L)
- Every 40L fill up,record the value shown on “Initial fuel level (mm)” on a paper until full.
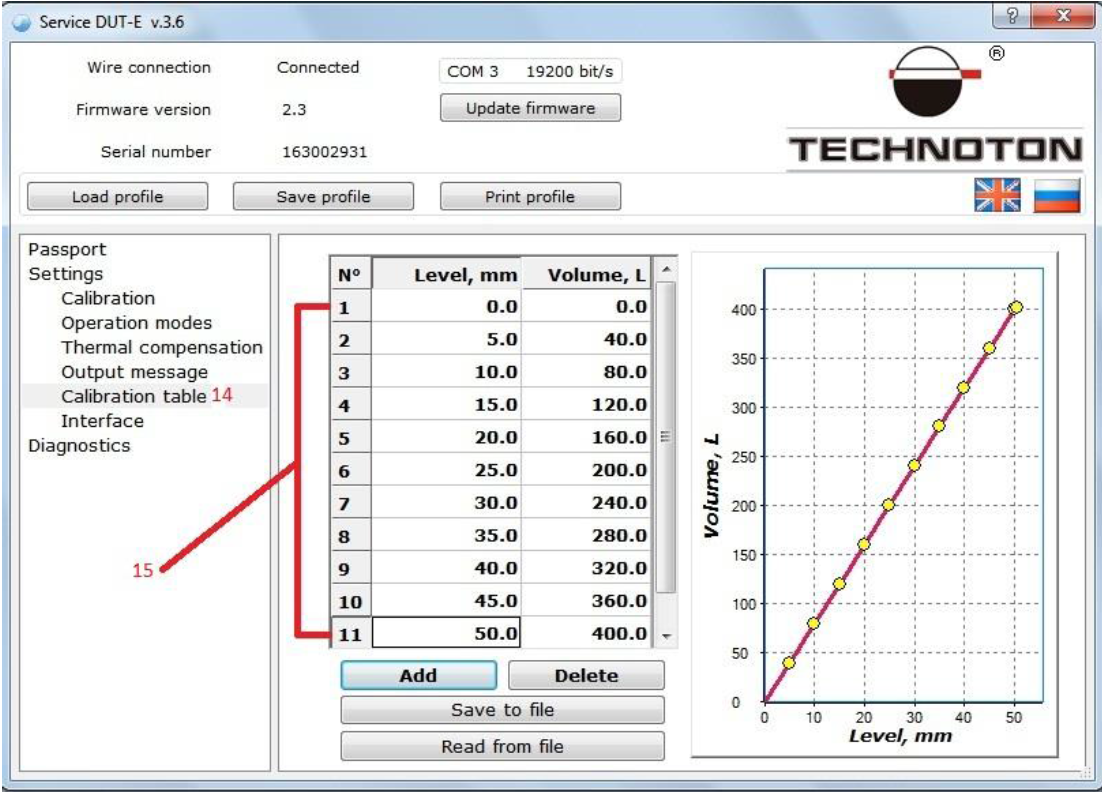
Calibration table
Enter the value level (mm) recorded earlier and equate to Volume L, remember to Save profile to sensor once done. Value shown above is just an example.
Example of a correct installation

Syrus Configuration
Once the Technoton is connected and calibrated, you can read fuel sensor values using the apx-serial-fs system tool.
# Set the serial mode for the Syrus to work with the fuel_sensor
$ apx-serial mode fuel_sensor

# Get the status of the fuel sensor
# Note that the level is the raw value read from the sensor
# If the steps above were followed (Output message)
# then the value is in deci-liters (874.6 liters)
$ apx-serial-fs status
{
  "state": "connected",
  "temperature": 40,
  "frequency": 1542,
  "level": 8746,
  "timestamp": 1693449370
}

# Set the consumption threshold to 50 deci-liters (5 liters) in 20 seconds
$ apx-serial-fs set --consumption-threshold=50 --consumption-window=20
$ apx-serial-fs set --fuelling-threshold=50 --consumption-window=20
Once you set the consumption threshold above you can configure a signal to generate an event using Syruslang
# Add fuel information to events
define fieldset default fields=$fuel

# Generate an event when the consumption threshold is reached
define event fuelTheft group=default
    fieldset=default code=20 label=excsvfl
    [email protected]

# Event for when fueling occurs
define event fuelAdded group=default
    fieldset=default code=21 label=fueling
    [email protected]

# Signal when fuel volume is < 25 liters
define signal fuelLow $fuel.level < 250

# Event when low fuel is detected
define event lowFuel group=default
    fieldset=default code=22 label=lwfuel
    trigger=fuelLow

# Signal when fuel level sensor is no longer detected
define event fuelSensorDisconnected group=default
    fieldset=default code=23 label=fueldisc
    trigger=$fuel.connected,not
Updated 9 months ago