Driver Monitoring + Dashcam Solution
This tutorial will show you how to connect a driver monitoring camera and a dashcam to simultaneously record the driver and the road when an incident happens.
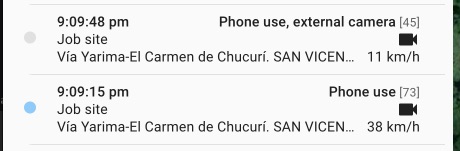
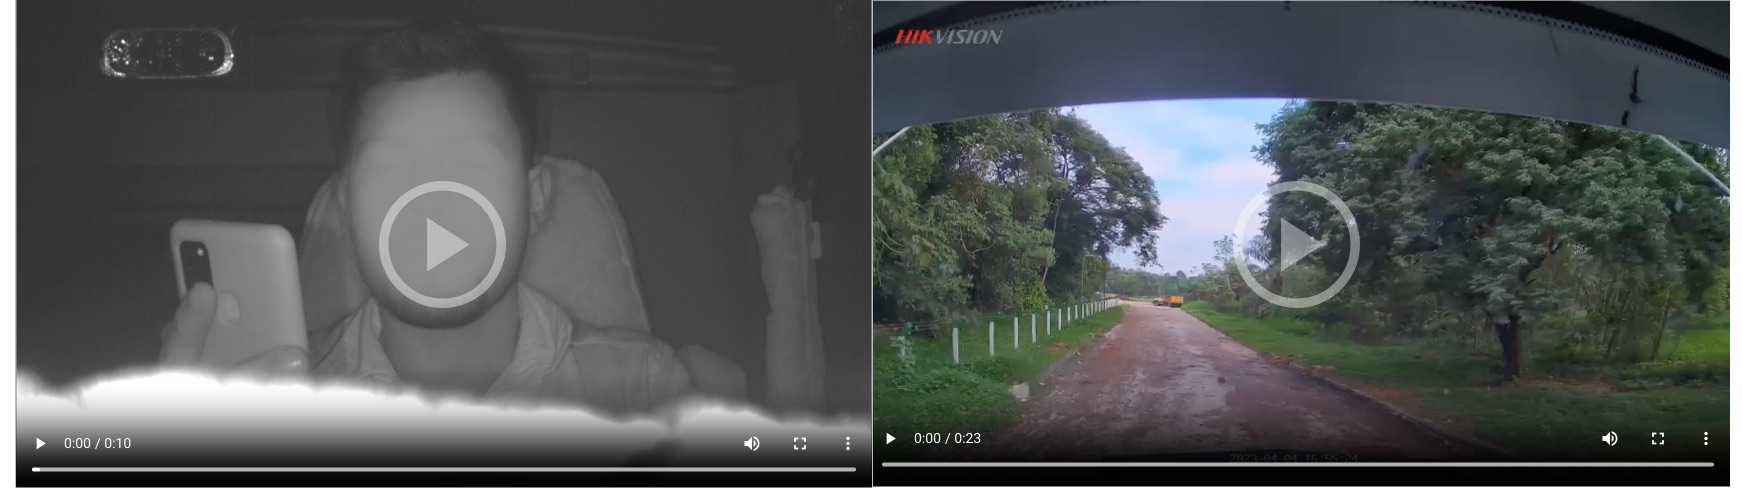
Result
You will learn
- How to connect a driver monitoring camera
- How to connect a dashcam
- Use Syruslang to capture photos and video clips
- Send the data to an external platform via FTP
You will need
- Driver monitoring camera (Cipia-FS10)
- Dashcam (Hikvision F6)
- Syrus 4 device
PrerequisitesUpdate Syrus to an ApexOS version of 22.47.1 or newer
Cipia version 1.0.1.31 or newer
Connect the DMS
The DMS camera we will use is a Cipia FS-10. You can follow this guide to connect the Cipia.
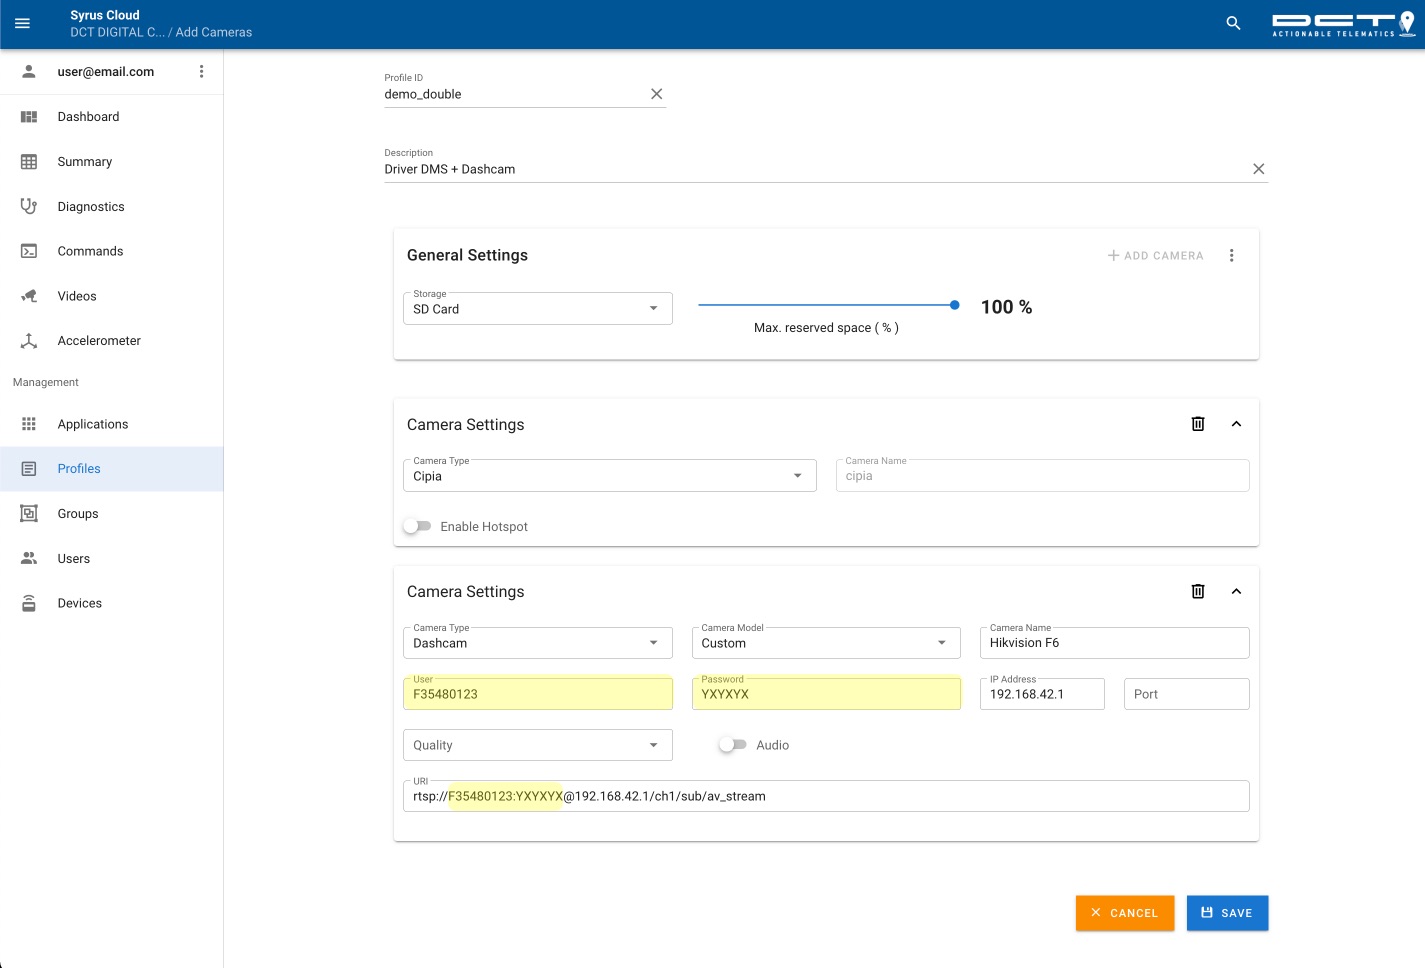
Next, download these files and upload using Syrus Cloud to your Syrus device. (Note that these are different than the one's found in the Connect guide).
Since we'll be connecting a Hikvision F6 camera we'll need to edit the configuration file as follow
"APModeEnable": false       -> this deactivates the internal cipia hotspot
"Password": "pass1234"      -> Dashcam password
"SSID": "HIKVISION-F6-ICPR" -> Dashcam SSID
"ServerAddress": "192.168.42.90" # IP of the
"Port": 1883
"VideoOverlay": {
"Enable": true, # whether the video timestamp overlay should be displayed
"TimeOffset": -6, # timestamp utc offset
"TimeSource": "Fix" # source of timestamp, read below for different options.
},
# TimeSource can be:
# Cellular network ("Cell") in which the vehicle is traveling at the time of event occurrence.
# (only applicable for FS10-LTE / FS10-LTE-ADS with cellular network connectivity)
# GNSS ("UTC"), which always provides UTC time. Ignores TimeOffset param
# GNSS ("Fix"), but with applied offset as defined in VideoOverlay.TimeOffset
WarningFor this configuration it is necessary that APModeEnable is set to false since the network that provides the DashcamF6 and the one that provides the CipiaFS10 are in the same network segment which causes a conflict in the connection.
Edit via system toolThe configuration parameters can also be edited via the
apx-ndm-cipiasystem tool.$ apx-ndm-cipia set --parameter='{"ServerAddress": "192.168.42.90","Port": 1883,"WifiSettings.SSID":"HIKVISION-F6-ICPR","WifiSettings.Password":"pass1234","WifiSettings.APModeEnable": false}' $ apx-ndm-cipia set --parameter='{"VideoOverlay.Enable": true},{"VideoOverlay.TimeSource": "Fix"},{"VideoOverlay.TimeOffset": -6}' $ apx-ndm-cipia configure
Next, configure the Syrus Wifi so that it connects to the same subnet as the Hikvision
$ apx-wifi set --ip=192.168.42.90/24 --gateway=192.168.42.255 --dns=8.8.8.8Next, configure the Cipia's MAC & ID
# send this command via Syrus Cloud or shell access
# replace <MAC> with your Cipia's MAC address, no colons ':' needed
# replace <ID> with the Cipia's Unit ID from the sticker
$ apx-ndm-cipia set --mac=<MAC> --id=<ID>

# example
$ apx-ndm-cipia set --mac=a404503cbd7c --id=E321290376
Next, connect the Syrus to the Cipia hotspot or make sure that they are on the same network. To do this use the apx-wifi tool to configure the Cipia address (be sure to use the same
$ apx-wifi add --ssid="FS-WiFi-503cbf1b" --pass="1234567890"Create a new video profile for the Syrus with the following settings and save it.
Be sure to update the highlighted parts with the User and Pass for your F6 camera.
Next, use the configuration command to configure the Cipia:
$ apx-ndm-cipia configure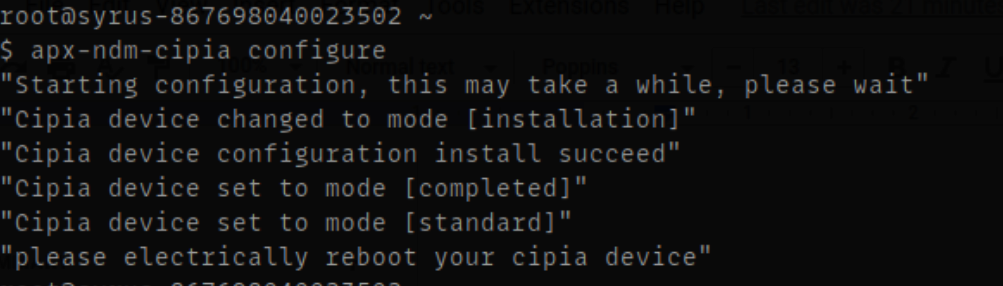
Once the configuration finishes disconnect and reconnect the Cipia from the power.
Finally, add the Hikvision camera's SSID as a wifi access point on the Syrus
$ apx-wifi add --ssid="HIKVISION-F6-XXXX" --pass="1234567890" # replace with your settingsDone.
You can query the status of the camera to make sure it's connected using apx-ndm-cipia status:
$ apx-ndm-cipia status

{
  "mac": "a404503cbf11",
  "id": "E321290015",
  "ip": "192.168.42.101",
  "connected": true,
  "firmware": "1.0.1.31"
}
Configure the events
Using Syruslang you can add video events that capture video events from the Cipia & Hikvision F6 camera using the same signal. Example snippet:
define event ev_phone_use_cipia group=tracking
    fieldset=default ack=seq label=ftgcamphon
    trigger=@fatigue_sensor.phone
    video=$fatigue_sensor.media.event

define action ac_phone_use_video
    trigger=@fatigue_sensor.phone
    set variable var_phone_use {{$gnss.timestamp}}-phone_use
    create video --name={{$variables.var_phone_use}} --time_win=-7,+3
    send event ev_phone_use_f6

define event ev_phone_use_f6 group=tracking
    fieldset=default ack=seq label=phonevid
    video=$variables.var_phone_use
Updated 8 months ago