Temperature Sensor
Syrus can communicate with compatible 1-wire digital thermometers that use a chip called: DS18B20. The DS18B20 is capable of communicating in two modes, a normal power mode and a parasite mode which derives power from the data line, eliminating the need for an external power supply.
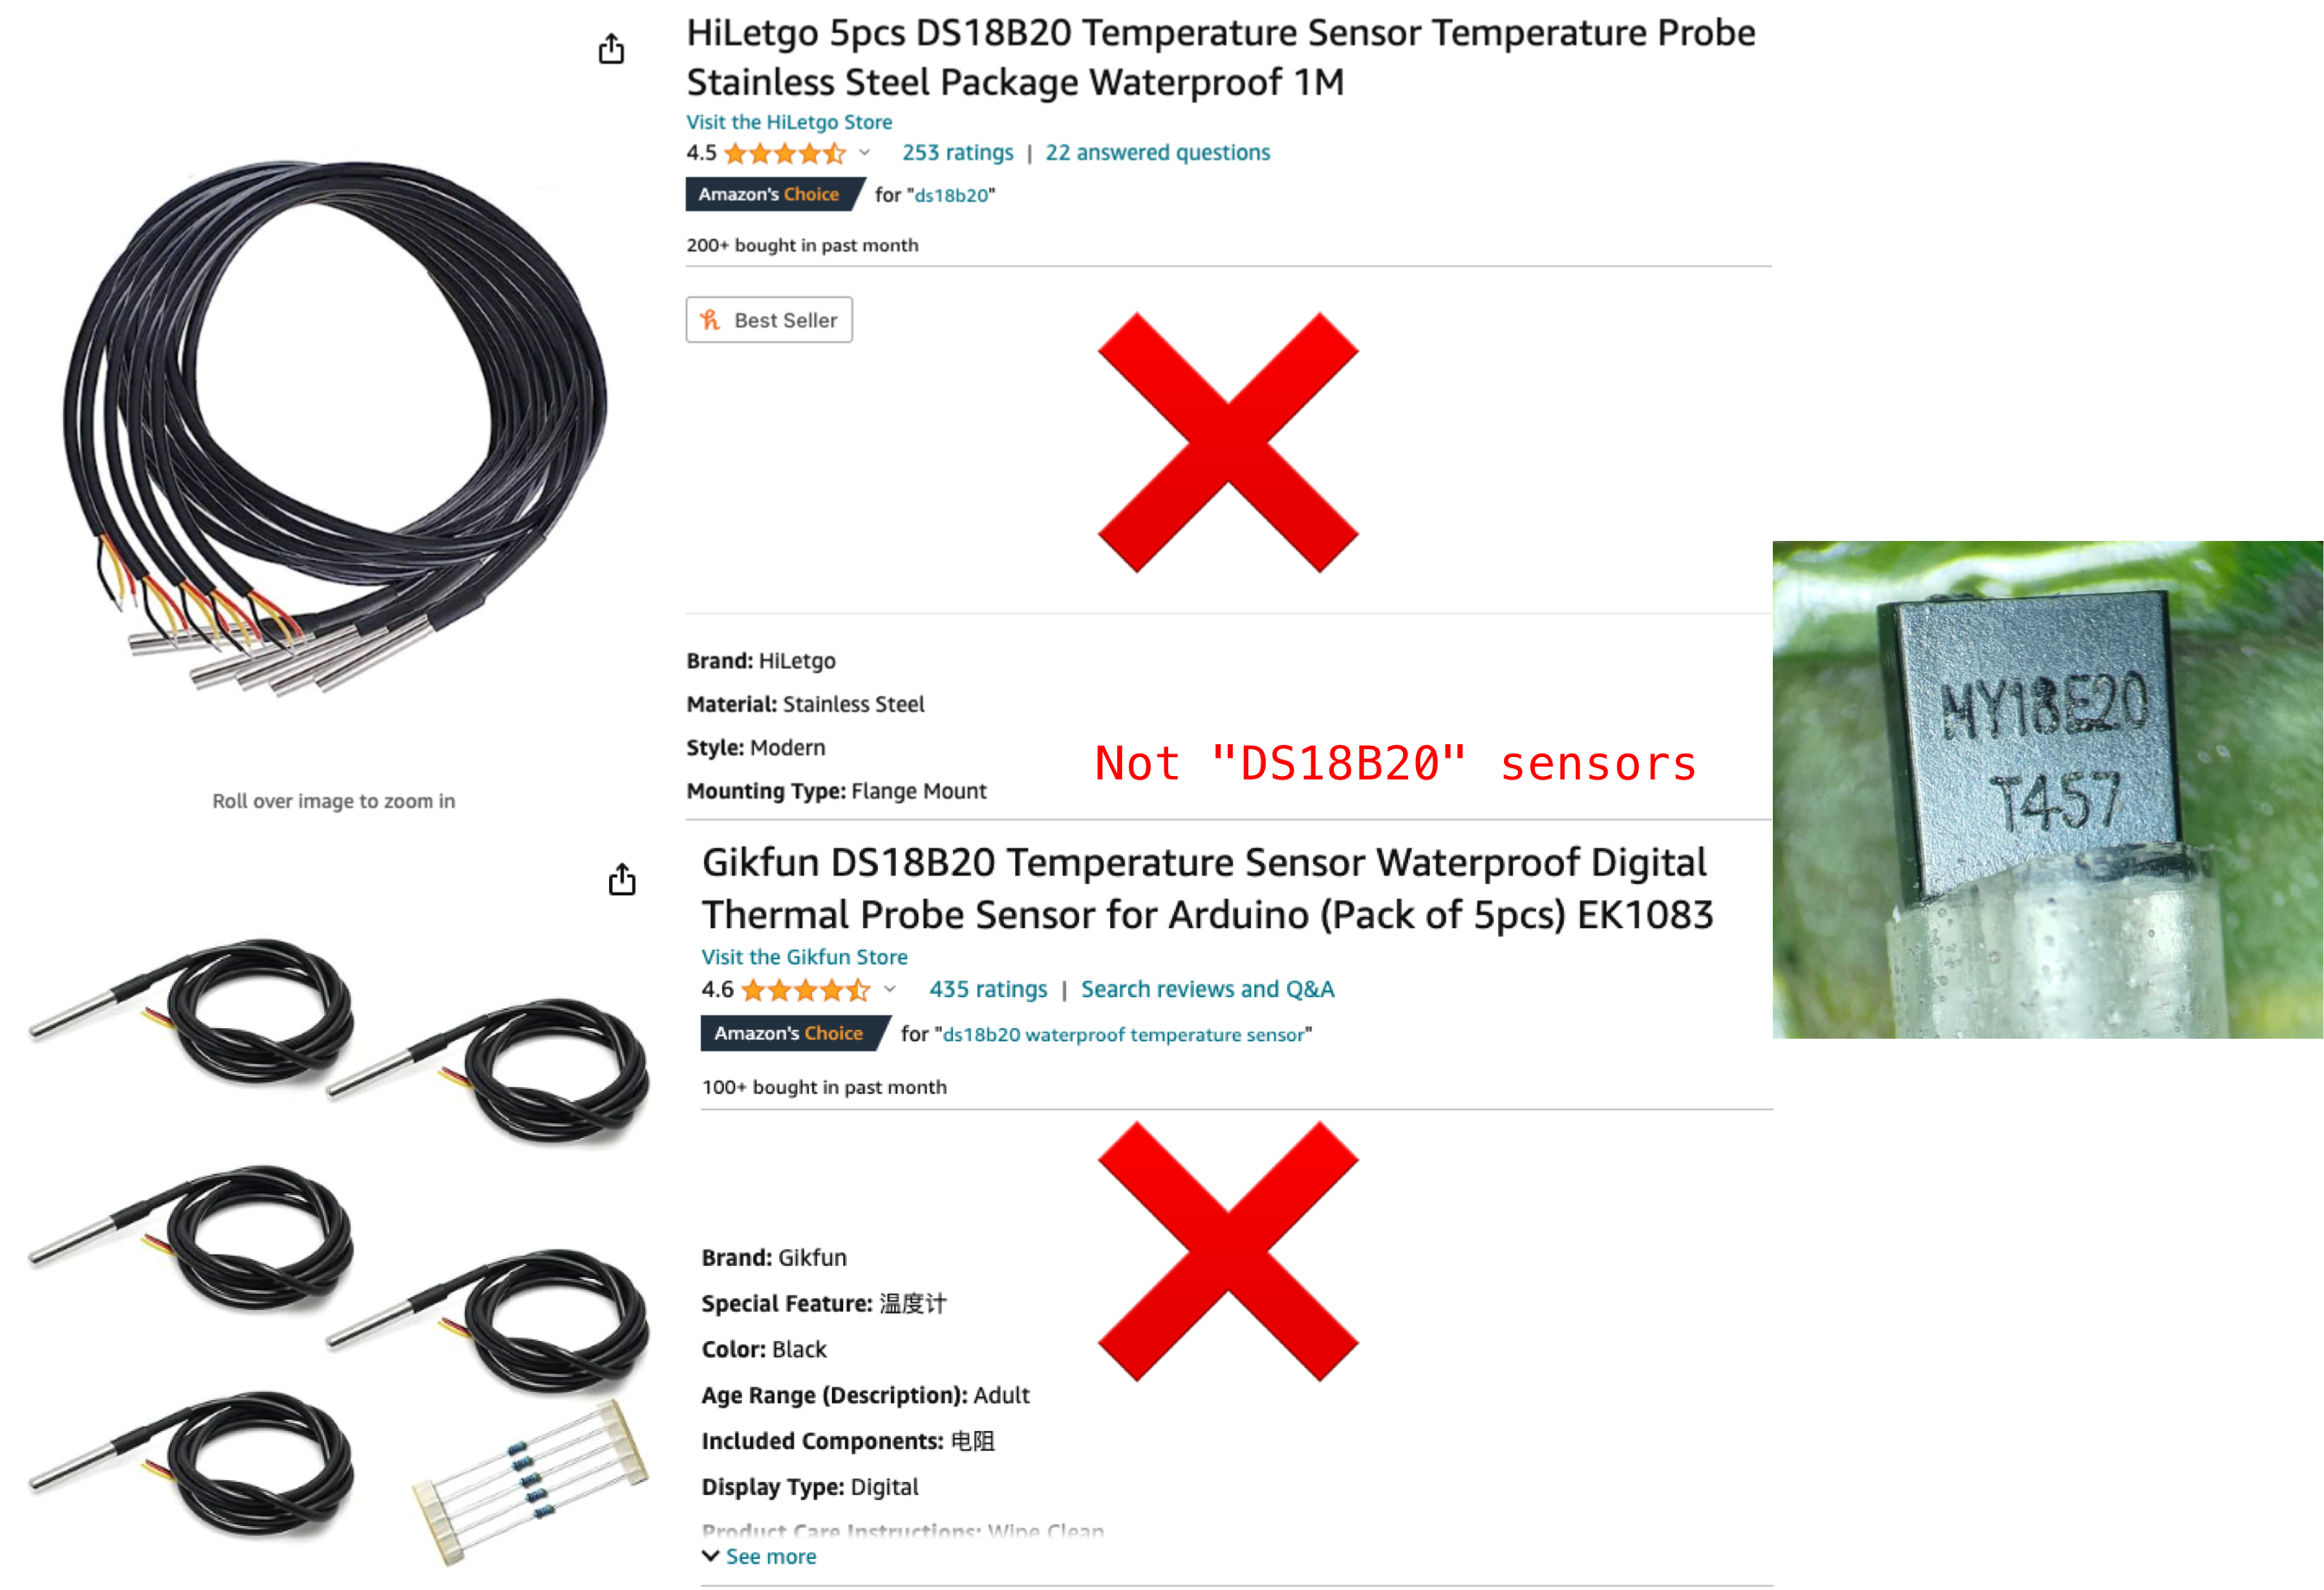
Warning when purchasing DS18B20 sensorsWhen purchasing these sensors be sure to read the reviews as there are a lot of sensors that may advertise DS18B20, but they don't actually use the chip and you're not able to read the temperature data from them.
Example of one that works:
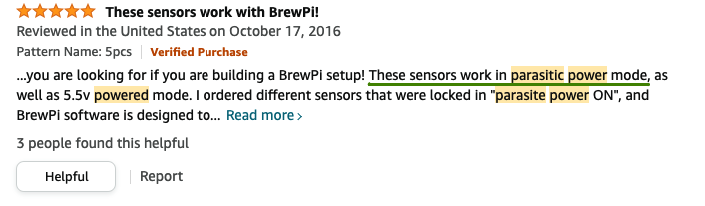
Look for sensors that say they work in parasitic power mode, which means they use the correct DS18B20 chip. Link to purchase.

For any 1-wire accessories such as temperature and ibutton sensors, up to 64 total sensors can be supported simultaneously. This means if you want to read an ibutton you can have a maximum 63 other temperature sensors connected all reading temperatures at the same time. Note that this does not affect the authorized/whitelisted list of ibuttons, up to 500 ibuttons or 1-wire accessories can be authorized for use with the apx-onewire tool.
General Overview
- The way it works is that you connect one or several temperature sensors in normal or parasite mode to Syrus
- You read the temperatures with the apx-onewire temperature getall command
- Give your temperature sensors aliases and install them
Installation
1-wire Wiring Pinout (found in 14-pin molex)
Parasite mode

| Temperature Wires | Signal | Description | Syrus Signal | Syrus Wires | |
|---|---|---|---|---|---|
| Yellow | DQ | Data signal, connect to the Syrus white/red 1-wire cable. Make sure to use the 14-pin molex white/red cable. | 1WIRE | ||
| Red | PWR | Connect to the Syrus electrical ground cable in parasite mode | GND | ||
| Black | GND | Connect to the Syrus electrical ground cable in parasite mode. | |||
Configuration
Once you have the temperature sensors connected, you can use the apx-onewire to read temperature
$ sudo apx-onewire temperature get_all{
"temperatures": [
{
"alias": "tempsen1",
"id": "8D01144D07DBAA28",
"value": 22.625,
"connected": true,
"epoch": 1608047806
},
{
"alias": null,
"id": "3C12345D07DBAB29",
"value": 22.437,
"connected": true,
"epoch": 1608047807
}
]
}Afterwards you can set an alias and proceed to install on a real life scenario.
Redis Interaction
To notify changes on a temperature sensor, the onewire application publishes:
onewire/notification/temperature/state onewire_temp_json_object
"PUBLISH" "onewire/notification/temperature/state" "{\"alias\":null,\"id\":\"8D01144D07DBAA28\",\"value\":27.437,\"connected\":true,\"epoch\":1610658389}"Tips
The ID of the 1-wire sensors is not printed on the temperature sensor, so you'll have to connect one at a time and use the get_all command to read the values, then assign an alias to each sensor.
Updated 8 months ago